 Author:



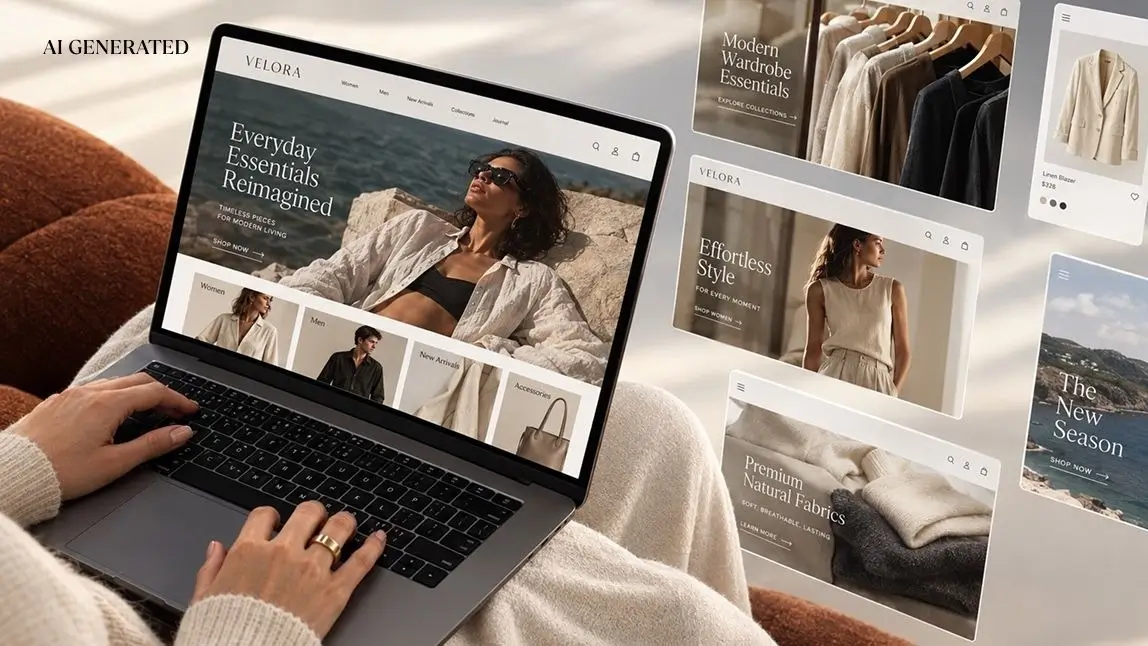
To start a clothing brand, work through eight steps in order:
- Choose a narrow niche and customer.
- Build a brand identity.
- Pick a production model and set a budget.
- Design and sample a small first collection.
- Line up a manufacturer.
- Create launch product photos.
- Set up an online store.
- Market the launch.
Many clothing lines take six months to a year to go from concept to first sale, and the founders who launch on schedule usually keep their first collection small.
This guide covers each step, including the costs, documents and decisions that first-time founders most often underestimate. One of those is product photography. Every style needs images that show how it looks on a real body. If you already have garment photos and a model photo, the AI Clothes Changer API can place each garment onto your own model photo. Step 6 explains when that makes sense and when a traditional shoot is still the better choice.
Table of Contents
- How to start a clothing brand: the 8 steps at a glance
- Step 1: Find your niche and audience
- Step 2: Build your brand identity and register the business
- Step 3: Choose a production model, write a business plan and set a budget
- Step 4: Design your first collection and make samples
- Step 5: Find a clothing manufacturer
- Step 6: Create product photos for launch
- Step 7: Set up your online store
- Step 8: Launch and market your clothing brand
- How growing clothing brands use virtual try-on beyond launch
- FAQ: starting a clothing brand
- Conclusion
How to start a clothing brand: the 8 steps at a glance

The table below works as a checklist. Each step produces something concrete that the next step depends on, so the order matters. You can't brief a manufacturer without tech packs, and you can't plan a launch without product photos.
| Step | Key decision | What you should have at the end |
|---|---|---|
| 1. Niche and audience | Who you dress, and why they'd choose you | A one-sentence positioning statement and evidence of demand |
| 2. Brand identity | Name, look, voice and legal setup | A cleared name, a domain and social handles, a logo and a registered business |
| 3. Plan and budget | Print-on-demand, private label or cut-and-sew | A budget, target margins and a launch date |
| 4. Design and sampling | Which 3–5 styles to launch | Tech packs and approved samples |
| 5. Manufacturer | Domestic or overseas, and which minimums you can afford | A signed quote with lead times and payment terms |
| 6. Product photos | Flat lay, mannequin, on-model shoot or try-on API | A complete image set for every product page |
| 7. Online store | Your own site, marketplaces or both | Live product pages with size charts, care info and policies |
| 8. Launch and marketing | Pre-launch audience and first-month channels | A waitlist, a launch calendar and your first orders |
Step 1: Find your niche and audience
Most failed clothing brands try to be "a clothing brand" for everyone. A useful niche has three parts:
- A specific customer: for example, women who commute by bike, or tall men who struggle to find trousers long enough.
- A problem or desire that existing options don't fully solve.
- A point of view that shows up in every design.
"Sustainable basics" is a category. "Linen workwear for warm-climate offices, cut for people who sit all day" is a niche.
Validate the niche before you spend money on production. Talk to people who fit your customer profile and ask what they buy now, what frustrates them and what they pay. Look at the price points and product mix of small, independent brands in the same space. Then test real demand with a landing page, a waitlist or a short pre-order window. Sign-ups and pre-orders count as evidence. Compliments don't.
Clothing brand vs. clothing line vs. online boutique
These terms are often used interchangeably, but they describe different businesses:
- A clothing brand is the identity: the name, values and look that customers recognize.
- A clothing line is a collection of products the brand designs and sells, so one brand can release many lines.
- An online boutique usually curates and resells garments from wholesale suppliers or other labels instead of designing its own.
If you want to start an online boutique, steps 1, 2, 6, 7 and 8 still apply, but sourcing from wholesalers replaces design, sampling and manufacturing.
Step 2: Build your brand identity and register the business
Your brand identity is what makes a plain T-shirt from your label feel different from an identical blank. Define these elements before any visual work starts, because they guide every later decision on fabric, photography and marketing:
- Your mission, in one sentence
- Two or three brand values
- Your brand story: why you, and why now
- Your tone of voice
The practical identity checklist:
- Name: short and easy to spell, and not already used in apparel. Search the USPTO trademark database and your state's business registry before you commit.
- Domain and social handles: claim them early, ideally matching the brand name exactly.
- Visual system: logo, color palette, typography and a photo style you'll reuse across your site, social channels and packaging.
- Labels and packaging: woven or printed neck labels, care labels with fiber content, hang tags and mailers. These are the first physical brand touchpoints a customer sees.
Next, set up the business. Many founders start as sole proprietors and form an LLC once they have revenue or want to separate personal and business liability. You'll also need to register with your state, get any required local licenses and set up sales tax collection. Requirements differ by state, so check your state's official resources and the U.S. Small Business Administration's guides, or talk to an accountant. This article isn't legal or tax advice.
Step 3: Choose a production model, write a business plan and set a budget
Your production model is the biggest decision in your budget. It determines your upfront cost, how much control you have over quality and fit, and your margin per garment.
| Production model | Upfront cost | Design control | Margin per unit | Best for |
|---|---|---|---|---|
| Print-on-demand | Very low: no inventory | Low: printed designs on stock blanks | Low | Testing graphics and audiences on a small budget |
| Private or white label | Low to medium | Medium: existing garments with your labels, colors or small changes | Medium | Fast launches of basics, loungewear and activewear |
| Cut-and-sew (small batch) | Medium to high: samples, minimums, inventory | High: your own patterns, fabrics and fit | Highest | Brands whose fit, fabric or construction is the differentiator |
| Handmade or made-to-order | Low to medium | High | Medium, limited by your time | Artisan, custom and very small-run brands |
A business plan for a clothing brand doesn't need to be long, but it should cover:
- Your customer and niche (from step 1)
- Your first collection and its price points
- Your production model and suppliers
- Your sales channels
- Your marketing plan
- A 12-month cash forecast
If you plan to apply for a loan or pitch investors, add an executive summary and a growth plan.
What goes into the budget
Budget for these categories:
- Design and tech packs
- Samples and revisions
- Bulk production and fabric minimums
- Labels and packaging
- Product photography
- Your website and apps
- Business registration
- Launch marketing
For reference, one industry breakdown puts a professionally designed logo at $300 to $2,500, and starting budgets for paid ads and influencer collaborations at $1,000 to $5,000. Production is usually the largest line. Get written quotes before you finalize the plan, and add a buffer for at least one extra round of sample revisions.
Price for margin from day one
Many new brands price by gut feel and find out later that they lose money once shipping, returns and ad costs are included. Start with your landed cost per unit: production, fabric, trims, labels, freight and duties. Set a wholesale price, then a retail price above it.
A common rule of thumb in apparel is to roughly double the landed cost to get wholesale, then double wholesale to get retail. As an illustration, a tee that costs $12 to make and land would wholesale at around $24 and retail at around $48. Your numbers will vary by category and channel, but if the math doesn't work at your planned retail price, change the product or the cost before production, not after.
How to start a clothing brand with little or no money
You can start with very little upfront if you trade margin and control for lower risk:
- Use print-on-demand or made-to-order so you never hold inventory.
- Run pre-orders so customers fund the first production run.
- Launch with one or two hero products instead of a full collection.
- Do your own photography, store setup and social content.
Expect to reinvest early revenue rather than pay yourself for a while.
Step 4: Design your first collection and make samples
Start smaller than you think you should. Launching with a focused collection of three to five key pieces keeps sampling costs, fabric minimums and inventory risk under control. It also gives you sharper marketing, because every piece gets attention.
Each style needs a tech pack. This is the technical document a factory uses to quote and produce your garment. A complete tech pack includes:
- Front and back flat sketches
- A measurement chart, with grading across all sizes
- Fabric and trim specifications
- Colorways
- Construction and stitching details
- Label placement
- Packaging instructions
Incomplete tech packs are the most common cause of costly extra sampling rounds, so pay for a skilled technical designer if you can't produce one yourself.
Sampling usually happens in stages:
- Proto sample: the first physical version, used to check the design.
- Fit sample: tried on real people across your size range, then adjusted.
- Pre-production sample (PPS): the final approved version that bulk production must match.
Hold fit sessions on more than one body type. The measurements you lock in here also feed your size chart and the fit notes on your product pages.
Step 5: Find a clothing manufacturer
Good places to find manufacturers include:
- Referrals from other founders
- Apparel trade shows
- Sourcing directories
- Local garment districts
- Sampling studios, which often work with small brands before production
Contact several manufacturers, send the same tech pack to each, and compare like-for-like quotes.
| Factor | Domestic manufacturing | Overseas manufacturing |
|---|---|---|
| Unit cost | Usually higher | Usually lower at volume |
| Minimums (MOQ) | Often lower, which suits small first runs | Often higher, per style and per color |
| Communication and visits | Easier, with the same time zone and language | Needs more planning or a sourcing agent |
| Lead time and shipping | Shorter, with simpler logistics | Longer, plus freight, duties and customs |
Questions to ask every manufacturer:
- What is the minimum order quantity per style and per color?
- What do samples cost, and how many revision rounds are included?
- What is the lead time from sample approval to delivery?
- What are the payment terms? A deposit plus a balance before shipping is common.
- How do you handle defects?
- Can you share references or compliance documentation?
Be cautious with suppliers who won't put terms in writing, ask for full payment before sampling, or can't explain how they'll match your approved sample.
Step 6: Create product photos for launch
Online, your product photos do the job of a fitting room. Shoppers can't touch the fabric or try the garment on, so they judge the drape, length, fit and quality almost entirely from your images. Most guides cover this in one line. It deserves a real plan, because every new style, color and drop needs a new set of photos.
Flat lay vs. mannequin vs. on-model photography

| Method | What shoppers see | Effort per new style | Best for | Limits |
|---|---|---|---|---|
| Flat lay | The full garment, with color, print and details | Low: one surface and good light | Detail shots, marketplaces, social posts | Doesn't show fit, drape or length on a body |
| Mannequin or ghost mannequin | The garment's 3D shape, without a person | Medium: needs a mannequin, plus editing for the ghost effect | Consistent catalog grids | Fixed body shape, less lifestyle appeal |
| On-model photoshoot | How the garment looks and moves on a person | High: model, photographer, location and styling for every drop | Hero images, campaigns, back and movement shots | Cost and scheduling repeat for every new style |
| On-model with a try-on API | Your garment on your own model photo | Low after one model shoot: reuse the model photos for new products | New styles and colorways, faster drops, catalog consistency | Uses the pose and angle of the model photo; doesn't create new angles or 3D views |
Most brands combine methods. A practical image set for each product page looks like this:
- A front on-model image as the main photo.
- A back view.
- A close-up of the fabric, print or hardware.
- A flat lay that shows the whole garment.
- Fit information: the model's height and the size worn, taken from a real fit session.
- One lifestyle or styled image.
How to create on-model photos with a virtual try-on API
A virtual try-on API takes two images, a garment image and a photo of a person, and generates a photorealistic image of that person wearing the garment. The AI Clothes Changer API works this way. It accepts front-facing product-only garment images, or garment photos that already feature a model. It adjusts the clothing to the person's body shape, proportions and lighting, and covers categories including dresses, tops, bottoms, outerwear, swimwear and shoes. It works from standard JPG or PNG images, so no 3D garment models are needed.

For a small brand, the workflow looks like this:
- Shoot your model photos once. Photograph one or more models in a simple, fitted base outfit, in the poses you want on your product pages. Use good light and a background that matches your brand. Perfect Corp. doesn't supply model avatars, so these are your own photos. Make sure your model agreement covers edited and AI-generated uses.
- Prepare clean garment images. A front-facing photo of the whole garment works best. The visible garment should cover the full area you want to try on.
- Test before you integrate. The API Playground has sample model photos, so you can check results with your own garment images before you write any code.
- Generate a result for each product. Each request returns a try-on image URL and a result ID. Developers can follow the AI Clothes API documentation to run requests for a whole collection.
- Review every image before publishing. Check the color, print placement, length and details against the physical sample, and reject anything that misrepresents the product.
A few points help you get the most from this approach:
- Output size follows input size. The result has the same resolution as the photo you upload, so start with high-resolution model photos. If you need a larger canvas, you can pair the result with other Perfect Corp. image tools such as the AI Image Extender.
- It's a visual try-on, not a sizing tool. Keep your size chart and fit notes based on real fit sessions.
- Keep real photos where they matter most. Back views, movement shots and fabric close-ups often still need a camera.
- You own your content. Brands own the images they upload and the results they generate, so you can use them across your store and channels. Follow any rules your sales channels have about AI-edited imagery.
For a deeper look at this workflow for ecommerce teams, read our guide to AI on-model product photography.
AI Clothes Changer API Playground
Upload a garment photo, pick a sample model and see the on-model result.
Step 7: Set up your online store
Most new clothing brands sell directly to customers online first. A hosted ecommerce platform gives you a store without custom development. Marketplaces and social shopping add reach but take a cut and limit your branding. Start with one or two channels you can manage well, and add more once orders are steady.

Pages every clothing store needs:
- Homepage: what you sell, who it's for and your hero products.
- Collection pages
- About page: your brand story.
- Size guide
- Shipping and returns policy
- Contact page and FAQ
On each product page, include:
- Your full image set from step 6
- Fabric composition and care instructions
- Measurements and fit notes (for example, "relaxed fit, size down for a closer fit")
- Delivery times
- A clear returns policy
Clear, honest fit information is one of the most effective ways to reduce avoidable returns.
Step 8: Launch and market your clothing brand
Start building an audience well before launch day:
- Share the design process, fabric choices and sampling on social media.
- Collect emails and phone numbers on a waitlist page.
- Give early subscribers first access or a launch-only perk.
Proven launch tactics for small brands:
- Gifting to creators: send pieces to small creators whose audience matches your customer.
- Email and SMS: owned channels you don't have to pay to reach.
- Pop-ups and local events: where people can touch the product.
- Limited drops: these create urgency without heavy discounting.
Track your conversion rate, average order value, return rate and customer acquisition cost from the first week, and adjust before you scale ad spend.
Once you have traction, wholesale becomes an option. Boutiques and retailers expect a line sheet with your styles, wholesale prices, minimums and delivery windows, and consistent on-model imagery makes that document far more persuasive.
How growing clothing brands use virtual try-on beyond launch
After launch, the photo problem from step 6 grows with every new release, and new ways to use the same technology open up. Fashion brands, retailers and ecommerce teams use a clothes try-on API in four main ways:
- New styles and colorways without a new shoot: generate on-model images for each new SKU on your existing model photos, so a drop can go live as soon as the garment images are ready.
- Campaigns and lookbooks: create consistent visuals for seasonal campaigns, social content and lookbooks from your product images.
- Shopper try-on: let customers upload a full-body, half-body or selfie-style photo and preview your garments on themselves. You can add this to a website, an iOS or Android app, in-store screens or your own backend and custom UI.
- Resale and take-back programs: give pre-owned items the same on-model presentation as new stock. Our guide to virtual try-on APIs for resale and secondhand marketplaces covers that use case.

Small brands and developers can start on their own. The AI Clothes Changer API is a RESTful API with Bearer authentication and JSON responses, and it supports JavaScript and Java, Flutter, Python, PHP, Node.js and cURL. API pricing is pay-per-use, so costs scale with the number of images you generate. If you plan a full shopper-facing experience, this step-by-step guide on how to build a clothes try-on app walks through the build.
Larger brands and retailers usually need integration support across a site, apps and stores. Perfect Corp.'s AI Clothes Changer business solution is built for that. More than 800 global brands have used Perfect Corp. technology, backed by over 10 years of AI and AR development. The platform is ISO/IEC 27001:2022 certified, and GDPR is applied company-wide.
Talk to Perfect Corp. about try-on
Plan on-model imagery and shopper try-on for your site, app and stores.
FAQ: starting a clothing brand
How much does it cost to start a clothing brand?
It depends mostly on your production model. Print-on-demand can start with a few hundred dollars, because you hold no inventory. Small-batch cut-and-sew usually needs several thousand dollars or more for tech packs, samples, minimum order quantities, labels, photography and launch marketing. Get written manufacturer quotes and build your budget from those, not from averages.
Can I start a clothing brand with no money?
You can start with very little by using print-on-demand or made-to-order production, taking pre-orders to fund your first run, launching one or two products, and doing your own design, photos and store setup. Expect lower margins at first, and plan to reinvest early revenue.
How long does it take to start a clothing line?
Most clothing lines take about six to twelve months from concept to first sale. Sampling and production take the most time, and overseas production adds freight and customs time. Print-on-demand brands can launch much faster.
Do I need an LLC to start a clothing brand?
No. Many founders start as sole proprietors and form an LLC later for liability protection or tax reasons. Registration, licensing and sales tax rules vary by state, so check your state's requirements or ask an accountant.
How do I start an online boutique instead of a clothing brand?
An online boutique curates and resells garments from wholesale suppliers or other labels. You skip design, sampling and manufacturing, but you still need a clear niche, a brand identity, strong product photos, an online store and a marketing plan. Your margin depends on the gap between wholesale and retail prices.
Do I need a fashion degree to start a clothing brand?
No. Many founders hire freelance designers, technical designers and patternmakers for the skills they don't have. What you do need is a clear vision for your customer and the discipline to manage costs, timelines and quality.
Can I use AI-generated on-model photos for my clothing store?
Yes, as long as the images accurately represent the garment. A virtual try-on API places your actual product image onto your own model photo, but you should still check every result against the physical sample. Keep fit and size information based on real fittings, and follow your sales channels' rules on AI-edited images.
Is print-on-demand or manufacturing better for a new clothing brand?
Print-on-demand is better for testing designs and audiences with minimal risk. Manufacturing, whether private label or cut-and-sew, is better once fit, fabric or construction is part of what makes your brand different, and once you have enough demand to meet minimum order quantities.
Conclusion
Starting a clothing brand comes down to a sequence of deliberate decisions. Pick a niche you can own, build an identity customers remember, choose a production model your budget can support, and keep the first collection small enough to perfect.
Then give each piece the presentation it deserves. Product photos are where many launches stall, because every new style restarts the shoot. Reusing your own model photos with a virtual try-on API keeps on-model images consistent as the line grows. A traditional shoot is still the right tool for campaigns, movement and back views.
AI Clothes Changer API
Create an account, get your API key and run your first try-on request.
This article was edited and reviewed by the Perfect Corp. editorial team. Welcome to contact us or give us more suggestions.